





VR Arena Equipment in 2026: Headsets, Network, Computers, and Haptic Vests
What a VR arena consists of
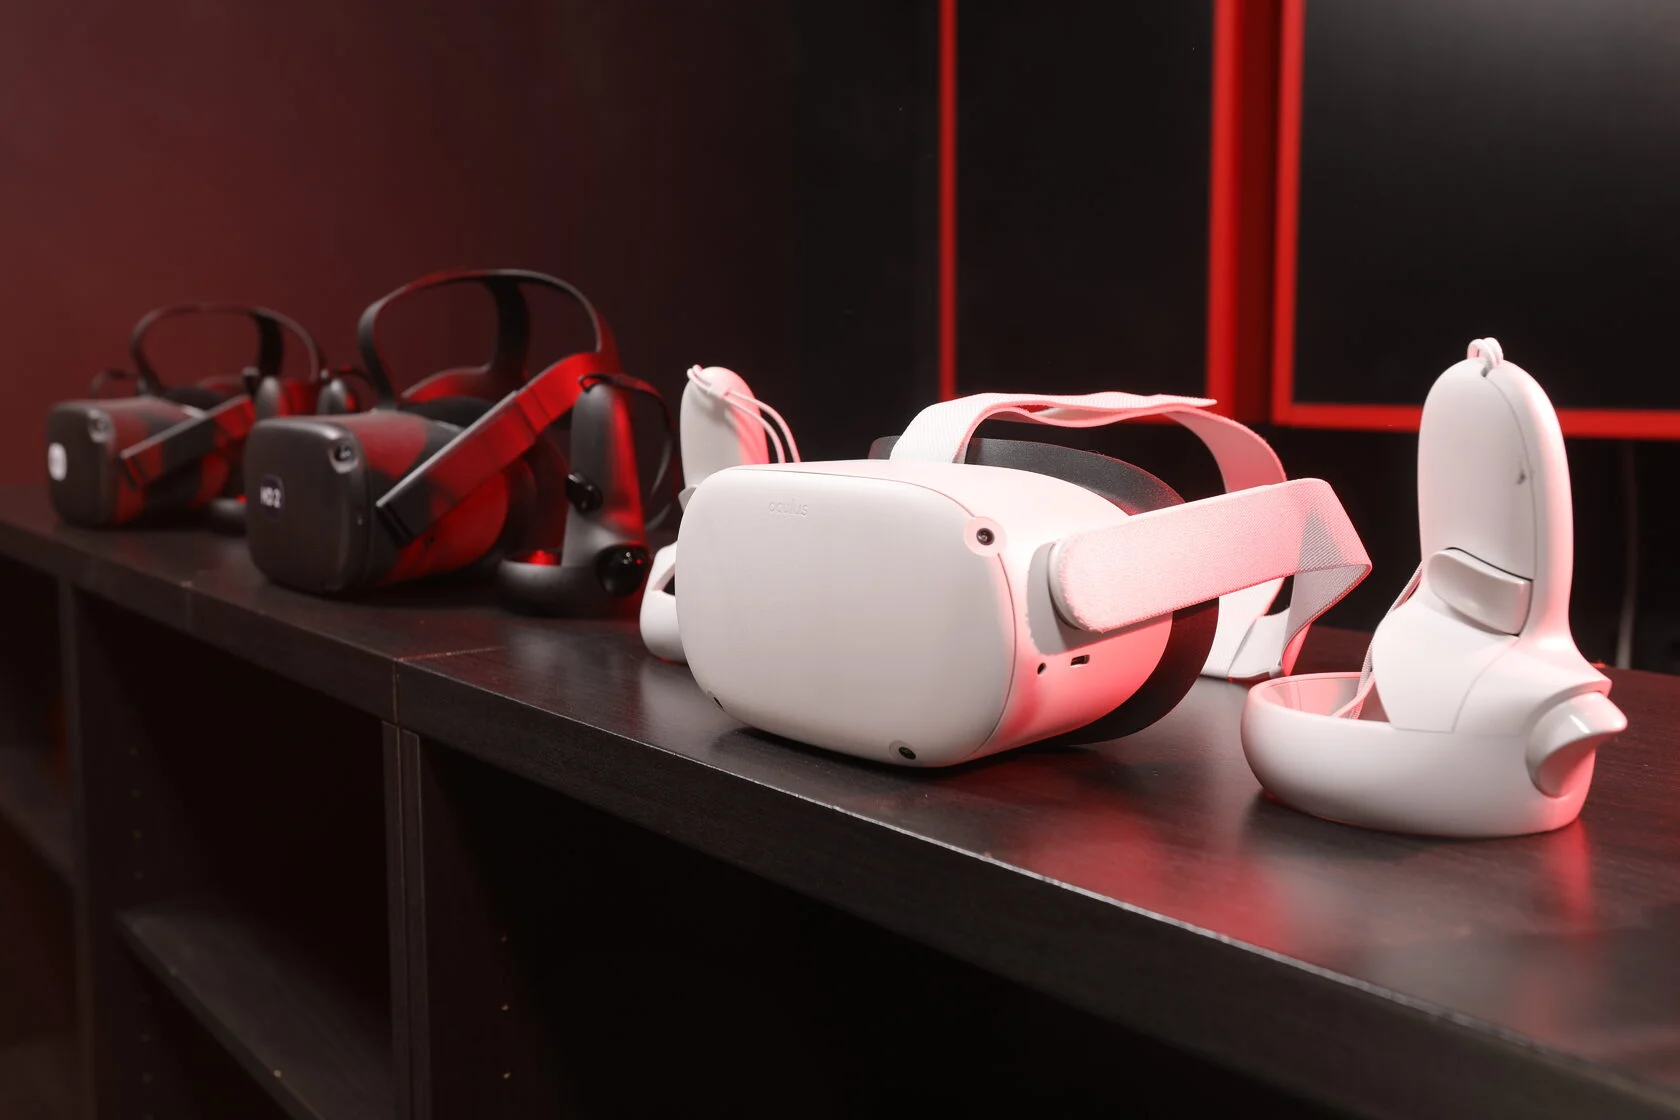
A VR arena is an integrated technical system. Headsets, computers, wireless networking, charging infrastructure, and software all need to work together and support the selected games and play-area format.
A VR arena can run games in two ways:
PCVR — the game runs on a computer, with the image streamed to the VR headset
Standalone — the game runs directly on the VR headset
The launch method determines how many computers are required, how the network should be designed, how the equipment is configured, and how the venue is operated.
This guide explains the main components of a VR arena, the available headset options, the differences between PCVR and Standalone, computer and network requirements, and the checks to complete before purchasing a full equipment batch.
A basic commercial VR arena setup includes:
VR headsets and compatible controllers
a server computer
gaming computers for PCVR configurations
a main router
one or more access points
a network switch for PCVR configurations
charging infrastructure
cables, adapters, and surge protectors
external batteries for the headsets
consumables for operation and sanitization
The equipment specification depends on more than the size of the premises. Before preparing it, determine:
the number of simultaneous players
the game launch method
the format and dimensions of the play area
the content library
the location of computers and network equipment
the available electrical capacity
the venue's operating schedule
Selecting headsets, computers, and networking equipment independently creates unnecessary risk. Devices that work well individually may still be incompatible as part of the same system.
How PCVR and Standalone differ
PCVR
In a PCVR configuration, the game runs on a computer and the image is streamed to the headset.
Using a gaming computer allows the system to run more demanding games with more realistic graphics than the headset's built-in processor can handle on its own. This also gives the venue access to Anvio's expanded PCVR game lineup and popular Steam VR titles such as Half-Life: Alyx.
A separate gaming computer may be required for each player. Session stability depends on computer performance, the wired infrastructure, and the quality of the wireless network.
A PCVR venue places greater demands on:
computer performance
wireless image streaming
power supply
cooling
wired networking
synchronized updates across gaming computers
Standalone
In a Standalone configuration, the game runs directly on the VR headset.
A separate gaming computer is not required for each player. The arena still needs a server computer, a local network, and equipment for managing gaming sessions.
Anvio's Standalone configuration uses Meta Quest headsets. Confirm the exact headset model and game version before purchase, as different device generations may behave differently with specific games and software updates.
Formats covered
This guide provides basic equipment configurations for three formats:
5×5 m PCVR
10×10 m PCVR
10×10 m Standalone
Anvio also supports scalable play areas that can be adapted to the shape of the premises and to spaces ranging from 16 to 400 m².
When choosing a format, consider the premises, expected number of players, available electrical capacity, and project budget.
Choose a VR arena formatHow different arena formats are equipped
| Equipment | 5×5 m PCVR | 10×10 m PCVR | 10×10 m Standalone |
|---|---|---|---|
| VR headsets | 4 | 6 | 6 |
| Server computers | 1 | 1 | 1 |
| Gaming computers | 4 | 6 | Not required |
| Access points | 1 | 2 | 1 |
| HDMI emulators | 4 | 6 | Not required |
| AA batteries | 10 | 14 | 12 |
| Battery chargers | 2 | 4 | 2 |
| Network switch | Required | Required | Depends on configuration |
| External batteries for headsets | Based on the number of headsets and operating schedule | Based on the number of headsets and operating schedule | Based on the number of headsets and operating schedule |
The table is a starting point, not a universal specification.
The final equipment list depends on:
the premises layout
headset models
selected games
computer placement
access point placement
expected load
charging and equipment-storage arrangements
For a scalable play area, prepare the equipment list separately. First, determine the size and shape of the play area and the number of players. Then determine the required quantities of headsets, computers, and network components.
How Anvio helps with equipment selection
Anvio does not sell equipment. Partners receive a list of required equipment and supporting technical materials, then purchase the equipment independently.
This allows partners to choose suppliers based on:
region
budget
equipment availability
delivery times
availability of the required models and hardware revisions
After the premises and configuration are approved, the Anvio team helps verify equipment compatibility, configures the software remotely, and tests the play areas.
The launch process includes:
1. Approve the premises and play-area format.
2. Receive the equipment list.
3. Purchase the equipment independently.
4. Complete remote software configuration.
5. Test the equipment and games.
6. Prepare for commercial launch.
Equipment is only the technical part of a VR arena project. A commercial venue also needs games, a session-management platform, operator training, a booking system, and technical support. Anvio provides these services to partners under the agreement.
Get the equipment listWhich VR headsets are suitable
When selecting VR headsets for a commercial venue, technical specifications are only part of the decision.
For commercial use, the following factors are especially important:
compatibility with the selected games
supported launch method
wireless connection stability
ease of maintenance
availability of replacement units
compatibility with accessories
a consistent charging and setup procedure
VR headset comparison
| Model | Price tier | Anvio Standalone | PCVR | Wireless network | Practical conclusion |
|---|---|---|---|---|---|
| Meta Quest 3 | Mid-range | Yes | Yes | Wi-Fi 6E | A balanced option for a standardized equipment fleet |
| Meta Quest 3S | Budget | Yes | Yes | Wi-Fi 6E | A more affordable alternative to Quest 3 |
| PICO 4 Ultra Enterprise | Upper mid-range | Yes | Yes | Wi-Fi 7 | A higher-priced commercial model |
| HTC VIVE Focus 3 | High | Yes | Yes | Wi-Fi 6E | A commercial model with a separate ecosystem |
The price tiers indicate the relative positioning of the models rather than prices from a specific supplier. Actual pricing depends on region, storage capacity, bundle, and delivery terms.
Meta Quest 3
Meta Quest 3 is suitable for building a standardized equipment fleet with identical headsets, controllers, accessories, and operating procedures.
The headset can be used in Anvio's Standalone configuration. For PCVR, configure image streaming from the computer separately and test the connection with all headsets operating at the same time.
Compared with Quest 3S, Quest 3 provides a sharper image and a wider field of view. For commercial venues, this can make Quest 3 a more comfortable option when the price difference fits the project budget.
Before purchasing a batch, confirm:
available built-in storage capacity
supply region
mounting compatibility
compatibility with external batteries
availability of replacement units with the same hardware revision
operation of the selected games
operation of Anvio software
Meta Quest 3S
Meta Quest 3S is a more affordable alternative to Quest 3, but the two headsets are not equivalent.
Quest 3S is designed to run the same modern applications, but it has lower image quality, a narrower field of view, and a different optical-system design.
For commercial use, the trade-off is straightforward:
Quest 3S reduces the initial equipment cost
Quest 3 provides higher image quality and greater comfort
Quest 3S does not have a 3.5 mm headphone jack. Wired headphones can be connected through USB-C, but the same port is also used for charging.
If the arena needs wired audio and power at the same time, determine the connection setup before purchasing the equipment.
Quest 3S is suitable for Anvio's Standalone configuration. Test PCVR use, accessory compatibility, and charging infrastructure before deployment.
PICO 4 Ultra Enterprise
PICO 4 Ultra Enterprise is designed for standardized commercial VR fleets. As an enterprise headset, it supports centralized management of devices, content, and settings.
It can be used in Standalone mode and in a PCVR configuration, connected to a computer via cable or Wi-Fi.
PICO 4 Ultra Enterprise is positioned in a higher-priced enterprise segment than Meta's consumer headsets.
Before purchase, confirm:
support for specific Anvio games
the required game launch method
compatibility with the management platform
equipment availability in the region
availability of replacement units
wireless network performance
the software update procedure
HTC VIVE Focus 3
HTC VIVE Focus 3 is a commercial-grade headset.
It can be used in Standalone and PCVR configurations, although exact support depends on the game and venue configuration.
The VIVE ecosystem differs from Meta Quest in its:
controllers
batteries
charging infrastructure
accessories
software
Avoid mixing different headset families within the same play area without prior testing.
What to consider when operating controllers
Controllers are part of the headset ecosystem rather than a universal equipment category. Each VR headset model uses its own controller family, and a controller from another brand generally cannot serve as a universal replacement.
For arena operators, controller procedures matter more than standalone technical specifications.
Establish a process for:
labeling each set as “headset — left controller — right controller”
keeping charged spares available
replacing batteries
checking pairing after updates
confirming that protective covers do not interfere with tracking
Treat controllers as part of the complete headset set. Changing the headset model may also require changes to controller inventory, batteries, protective accessories, and operator instructions.
How to check equipment and game compatibility
Support for PCVR or Standalone does not mean that every game will work with a particular headset.
Check compatibility at the following levels before purchasing equipment.
1. Headset and launch method
Confirm that the game supports the selected launch method:
Standalone — the game runs directly on the headset
PCVR — the game runs on a computer and the image is streamed to the headset
2. Headset and Anvio software
Verify that the launch platform, session management, and statistics collection work correctly.
3. Headset and venue infrastructure
Check compatibility with:
the wireless network
charging infrastructure
external batteries
mounts
headphones
adapters
software
A complete public table matching every Anvio game with a specific headset model and launch method has not been published.
Confirm final compatibility against the current technical specification before purchasing a batch of equipment.
How to calibrate VR headsets
Calibration ensures that all players are represented correctly within the shared play space. It aligns player positions with the common play area and helps reduce the risk of collisions.
The calibration procedure differs between PCVR with streaming and native Standalone operation.
PCVR / streaming
In a PCVR configuration, calibration is performed through SteamVR and usually requires little operator input.
For example, when using Meta Quest, assign the appropriate calibration button, start the procedure, and allow it to complete.
Standalone
In native Standalone mode, calibration is performed directly in the game and requires a more detailed setup process.
Enter setup mode, place anchors that act as reference points for the play area, and set the floor position in the headset.
In Anvio games, calibration is performed once per day on each device, provided the equipment is not powered off.
Before each shift, the operator should also:
check that the headset cameras are clean
confirm that the lighting in the play area has not changed
check the floor level
reconfigure boundaries if necessary
run a short movement test
check headset and controller tracking throughout the play area
For Meta Quest 2 and Quest 3, Anvio recommends regularly clearing the saved Guardian history and recalibrating the floor level and boundaries.
Check Guardian status at least once a day and before the start of the work shift.
The exact settings path may change after firmware updates. Use instructions that match the software version installed on the headset.
Reconfigure the system when:
headsets are moved between rooms
furniture placement changes
the play-area configuration changes
lighting changes significantly
How to build the Wi-Fi network
The role of the wireless network depends on the game launch method.
In PCVR, the network carries the stream between the computer and the headset, so network stability directly affects latency and image quality.
The main router and access point have different roles:
the main router manages the local network and internet connection
the access point provides wireless connectivity between the headsets, computers, and server
The basic configurations use:
one access point for 5×5 m PCVR
two access points for 10×10 m PCVR
one access point for 10×10 m Standalone
Requirements for different headsets
| Headset model | Supported Wi-Fi generation | Recommendation |
|---|---|---|
| Meta Quest 3 | Wi-Fi 6E | For PCVR, use a dedicated Wi-Fi 6E access point and test operation in the 6 GHz band |
| Meta Quest 3S | Wi-Fi 6E | Use the same approach as for Quest 3 and test all headsets operating simultaneously |
| PICO 4 Ultra Enterprise | Wi-Fi 7 | Wi-Fi 7 can be considered for new infrastructure, but test the configuration with the required games and software |
| HTC VIVE Focus 3 | Wi-Fi 6E | For PCVR, use a dedicated access point and separately test game-stream transmission |
Support for a particular Wi-Fi generation does not guarantee stable performance on its own.
Connection quality is affected by:
the number of headsets operating simultaneously
congestion from neighboring networks
the selected radio channel
walls and columns
other physical obstacles
access point installation height
access point placement
firmware version
cable-run length
wired network performance
In PCVR configurations, do not connect the headsets to the venue's general guest network. The VR arena access point should be dedicated to the gaming infrastructure.
For wired connections, use at least Cat5e cabling. For new infrastructure, Cat6 or Cat6a can be used.
Determine access point placement and cable lengths after reviewing the actual premises layout.
What computers are needed for PCVR
In PCVR, the computer runs the game and streams the image to the VR headset.
Standalone configurations do not require a separate gaming computer for each player, but they still use one server computer.
Computers can be purchased prebuilt or assembled from individual components. Use a proven configuration with performance headroom above the minimum requirements.
Minimum gaming computer configuration
| Component | Minimum configuration |
|---|---|
| Processor | Intel Core i5-12400F |
| Graphics card | GeForce RTX 4060 |
| RAM | 16 GB |
| Storage | 512 GB SSD |
This is the minimum configuration. Matching the component names alone does not guarantee that a particular build will be suitable for the arena.
Check:
exact component models
component compatibility
cooling
case dimensions
service access
operation with the current version of Anvio software
10×10 m Standalone
The configuration uses one server computer.
Separate gaming computers are not required for players.
5×5 m PCVR
The configuration requires:
one server computer
four gaming computers
four HDMI emulators
Each headset is assigned to a separate gaming computer.
HDMI emulators must support at least 1080p at 60 Hz and HDCP. They allow remote access to function correctly without a physical monitor connected.
10×10 m PCVR
The configuration requires:
one server computer
six gaming computers
six HDMI emulators
This setup places greater demands on:
power supply
cooling
wired networking
equipment placement
synchronized updates across all computers
Operating system requirements
The computers use:
Windows 10 Pro 22H2 or a newer supported version
Windows 11 Pro 24H2 or a newer supported version
The operating system edition must be Pro.
Confirm the currently supported Windows version with Anvio before installation.
Do not choose an operating system simply because it is the newest version available, and do not use an outdated system image without prior verification.
What to check before assembly
Before purchasing components, verify:
graphics-card and case dimensions
power-supply wattage and connectors
number of USB ports
network interface
cooling system
access to components for servicing
power-cable lengths
network-cable lengths
support for HDMI emulators
Build one reference station first. Install the software and run a full gaming session.
Replicate the configuration across the remaining computers only after the reference station has passed testing.
Are haptic vests necessary?
A haptic vest uses vibrations to reproduce in-game events such as hits, explosions, and other actions.
Vests can increase immersion, but they also add equipment that needs to be:
charged
stored
updated
connected
sanitized between sessions
For VR arenas, the bHaptics TactSuit Air and TactSuit Pro models are considered.
Haptic vest comparison
| Model | Number of vibration motors | Claimed battery life | Charging time | Use case |
|---|---|---|---|---|
| bHaptics TactSuit Air | 16 | Up to 12 hours | About 2.5 hours | A lighter and more affordable option |
| bHaptics TactSuit Pro | 32 | Up to 13.5 hours | About 5 hours | More pronounced and precise feedback |
TactSuit Air reduces both equipment cost and the amount of weight worn by the player.
TactSuit Pro provides more detailed feedback for in-game events, but it costs more and takes longer to reach a full charge.
Before purchase, request an up-to-date list of:
games with haptic support
supported vest models
compatible game versions
requirements for Standalone
requirements for PCVR
The bHaptics ecosystem can operate through Windows and Quest. Audio-to-Haptics mode converts sound into vibrations but does not replace native support for in-game events.
The 10×10 m PCVR configuration considered here also uses six TP-Link UB500 Bluetooth adapters.
Before adding haptic vests, verify:
support in the specific game
Bluetooth adapter compatibility
driver compatibility
charging infrastructure
full charge time
storage space
sanitization procedures
operator procedures for a lost connection
What to include in the budget
Headsets and computers alone do not make a complete VR arena.
In addition to the main equipment, include the following in the budget:
charging stations
power adapters
external batteries for headsets
a network switch
cables and patch cords
surge protectors
headphones
sanitization consumables
equipment labels
spare charging cables
HDMI emulators for PCVR
mounts
cable-routing infrastructure
A missing small component can delay the opening or interrupt a gaming session.
Plan consumables and backup equipment alongside the main specification rather than after the headsets and computers have already been installed.
How to test the configuration before launch
Select equipment based on compatibility across the entire system, not only on the specifications of individual devices.
Before purchasing a full batch, assemble one reference kit with:
a VR headset
compatible controllers
an external battery
a charging cable
headphones
an access point
a gaming or server computer
the required adapters
current software
After assembly, run a full operating cycle.
For help validating the configuration, request a consultation.
Launch your VR arenaConclusion
Recommended launch sequence
1. Determine the budget and available space.
2. Choose PCVR or Standalone.
3. Determine the play-area format.
4. Approve the premises plan.
5. Receive the equipment list.
6. Assemble one test kit.
7. Complete remote configuration and testing.
8. Replicate the verified configuration across the remaining devices.
9. Proceed to commercial launch.
For franchise partners, Anvio provides games, a launch platform, a booking system, remote configuration, training, technical support, and project assistance.
The franchise model also includes the right to operate under the Anvio brand and access to launch and promotional tools.
The equipment forms the technical foundation of the venue. A commercial VR arena depends on the headsets, games, network, premises, and operating processes working together as one system.
Launch your VR arena


